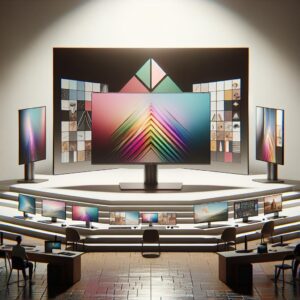
Choosing a monitor for high-end video editing is not just about buying the biggest screen with the highest resolution. For serious editing work, the monitor becomes part of your color pipeline, your review process, and your final quality control before a video reaches clients, platforms, broadcasters, or viewers.
A good editing monitor should help you judge exposure, contrast, skin tones, shadows, highlights, and color balance with confidence. A weak monitor can make a clean grade look too saturated, hide shadow noise, exaggerate brightness, or cause you to deliver footage that looks different on other screens.
The challenge is that monitor specifications can be confusing. Terms like 10-bit color, DCI-P3, Rec. 709, HDR, OLED, mini-LED, factory calibration, Delta E, DisplayHDR, and hardware calibration often appear together, but they do not all mean the same thing.
This guide explains what matters most, what can be ignored, and how to choose a monitor based on the type of editing work you actually do. The goal is to help you make a safer buying decision without relying only on marketing claims.
For most editors, the best choice is not always the most expensive display. It is the monitor that matches the delivery format, supports reliable color management, fits your workspace, and can be calibrated properly over time.
Important note: before buying a professional monitor, confirm the specifications on the manufacturer’s official page, check your editing software’s color management requirements, and avoid making color-critical decisions on an uncalibrated display.
What Really Matters in a Monitor for High-End Video Editing
The most important qualities in a monitor for high-end video editing are color accuracy, panel consistency, bit depth, resolution, brightness behavior, contrast, connectivity, and calibration support. A monitor can look impressive in a store and still be unreliable for professional grading if it cannot reproduce colors consistently.
For standard video delivery, Rec. 709 accuracy is usually more important than extreme brightness or a gaming-style refresh rate. For HDR work, brightness, local dimming, black level, tone mapping behavior, and HDR workflow support become much more important.
In practice, many editors make the mistake of buying a monitor because it says “HDR” or “wide color” on the box. Those labels can be useful, but they do not automatically prove that the monitor is suitable for high-end color work.
| Specification | Why It Matters | What to Check Before Buying |
|---|---|---|
| Color gamut | Shows which color spaces the monitor can reproduce. | Check Rec. 709, sRGB, DCI-P3, Adobe RGB, or Rec. 2020 coverage depending on your workflow. |
| Color accuracy | Helps footage look closer to the intended grade. | Look for factory calibration reports and independent testing when available. |
| Bit depth | Reduces visible banding in gradients and color adjustments. | Prefer true 10-bit support or reliable 8-bit plus FRC for demanding work. |
| Panel uniformity | Keeps brightness and color more consistent across the screen. | Look for uniformity compensation or professional review tests. |
| Calibration support | Allows the monitor to stay accurate over time. | Check whether it supports hardware calibration, ICC profiles, or internal LUT calibration. |
| Connectivity | Determines whether your computer can send full resolution, refresh rate, and bit depth. | Confirm DisplayPort, HDMI, USB-C, Thunderbolt, and GPU compatibility. |
Color Accuracy, Gamut, and Bit Depth Explained Simply
Color gamut refers to the range of colors a monitor can display. For web video, YouTube, corporate content, education, and most social media work, Rec. 709 or sRGB accuracy is usually the main target. For cinema-style work, DCI-P3 may matter more. For HDR mastering, Rec. 2020 handling becomes part of the workflow, even though many monitors cannot fully cover Rec. 2020.
Color accuracy is different from color gamut. A monitor may show a wide range of colors but still display them incorrectly. That is why an accurate Rec. 709 monitor can be more useful than a very wide-gamut monitor that is poorly calibrated.
Bit depth affects how smoothly a monitor displays tonal transitions. A 10-bit workflow can help reduce banding in skies, gradients, shadows, and subtle color shifts. However, the full chain matters: GPU output, cable, operating system, editing software, monitor input, and project settings all need to support the intended signal.
- Confirm which color space your final videos are delivered in.
- Prioritize Rec. 709 accuracy for standard online and broadcast-style SDR work.
- Choose strong DCI-P3 coverage if you regularly work on cinematic or wide-gamut content.
- Do not assume “wide color” means accurate color.
- Check whether 10-bit output is supported by your computer, GPU, cable, and monitor.
- Look for real calibration options instead of relying only on default picture modes.
Resolution and Screen Size: 4K, 5K, 6K, or Ultrawide?
Resolution affects how much detail and interface space you can see while editing. A 4K monitor is often the practical minimum for serious high-end video editing because it lets you view 4K footage with good detail while still keeping space for panels, scopes, bins, and timelines.
A 27-inch 4K monitor is sharp and practical for many desks. A 32-inch 4K monitor gives more comfortable scaling and more room for interface elements. A 5K or 6K display can be excellent for editors who want sharper text, more timeline space, and a clean preview experience, especially on macOS workflows.
Ultrawide monitors are useful for timeline editing, audio work, multicam organization, and productivity. However, they are not always the best choice for color-critical review because many ultrawide models focus more on immersion and refresh rate than strict color consistency.
| Monitor Type | Best Use | Main Limitation |
|---|---|---|
| 27-inch 4K | Sharp editing workspace for small and medium desks. | Interface scaling can feel small for some users. |
| 32-inch 4K | Balanced choice for editing, grading, and client review. | Needs more desk depth for comfortable viewing. |
| 5K or 6K | High-detail interface work, sharp text, and premium creative workflows. | Usually costs more and requires compatible hardware. |
| Ultrawide | Timeline editing, audio sessions, multitasking, and productivity. | May not be ideal as the only color-critical monitor. |
| Dual-monitor setup | Separating timeline, scopes, bins, and full-screen preview. | Color matching between two displays can be difficult. |
HDR Editing: When You Need It and When You Do Not
HDR editing requires more than a monitor that can accept an HDR signal. A true HDR workflow depends on brightness, contrast, black level, local dimming quality, tone mapping, color management, and the delivery standard used by the project.
If your work is mainly SDR content for websites, courses, ads, interviews, social media, or standard client videos, a highly accurate SDR monitor may be a smarter investment than a weak HDR monitor. Good SDR accuracy is still extremely valuable.
If you deliver HDR content, you need to be more careful. Look for reliable peak brightness behavior, strong contrast, useful HDR modes, 10-bit support, and clear documentation from the manufacturer. OLED and mini-LED displays can both be strong options, but each has trade-offs.
OLED usually offers excellent black levels and contrast, but buyers should consider brightness limits, automatic brightness behavior, and image retention risk. Mini-LED can reach higher brightness, but local dimming quality varies and may create blooming around bright objects on dark backgrounds.
Panel Technology: IPS, OLED, Mini-LED, and Professional Reference Displays
IPS monitors are common in editing setups because they usually offer stable viewing angles and good color performance. A high-quality IPS monitor with strong calibration can be a dependable choice for SDR editing, especially when the budget does not allow for a true reference display.
OLED monitors offer deep blacks and strong contrast, which can be excellent for visual review and HDR-style work. However, they may not be the safest option for every editor because static interfaces, timelines, and panels can stay on screen for long sessions.
Mini-LED monitors use many dimming zones to improve contrast and HDR brightness. They can be powerful for HDR work, but the number of dimming zones does not tell the full story. The dimming algorithm, panel quality, blooming control, and calibration behavior also matter.
Professional reference displays are designed for critical evaluation and are usually much more expensive than standard monitors. They are used when the cost of color mistakes is high, such as broadcast delivery, cinema finishing, streaming platform masters, and client-approved color grading.
How to Evaluate a Monitor Before Buying
A safe buying decision starts with your actual workflow. Before comparing models, define what you edit, where the video will be delivered, which software you use, and how color-critical your work is. This prevents overspending on features that look impressive but do not solve your real problem.
-
Define your delivery format.
Decide whether your work is mainly SDR, HDR, web, broadcast-style, cinema-style, or mixed delivery. This tells you which color spaces and brightness behavior matter most.
-
Check your editing software workflow.
Confirm how your software handles color management, HDR, monitoring, LUTs, scopes, and external displays. The monitor should fit the workflow instead of forcing you to guess.
-
Confirm your computer output.
Make sure your GPU, port, cable, and operating system can send the resolution, refresh rate, bit depth, and color format you expect.
-
Read the manufacturer’s technical page.
Do not rely only on marketplace listings. Check the official page for color gamut, calibration features, panel type, ports, HDR standards, and warranty information.
-
Look for calibration evidence.
Prefer monitors with a factory calibration report, hardware calibration support, or compatibility with trusted calibration tools.
-
Check independent reviews when available.
Look for tests that measure color accuracy, brightness uniformity, HDR performance, contrast, response behavior, and real-world limitations.
-
Plan the setup before purchase.
Measure your desk, check viewing distance, confirm monitor arm support, and decide whether you need one main display or a separate reference monitor.
Calibration and Color Management After Setup
Even a strong monitor can drift over time. Calibration helps bring the display closer to a known target, while profiling helps the system understand how the monitor behaves. For serious editing, this is not an optional detail.
Factory calibration is useful, but it does not always account for your room lighting, brightness target, software settings, or long-term panel changes. A colorimeter or spectrophotometer can help keep the monitor aligned with your workflow.
For SDR work, many editors calibrate around a comfortable brightness level and a standard target such as Rec. 709, depending on the project and viewing environment. For HDR, calibration and monitoring become more complex and should follow the requirements of the delivery format.
- Use controlled room lighting instead of editing in changing sunlight.
- Let the monitor warm up before critical color work.
- Set the correct color mode for your project, such as Rec. 709 for SDR delivery.
- Use video scopes instead of judging everything by eye.
- Recalibrate periodically, especially before important client or delivery work.
- Avoid changing brightness, contrast, or color modes after profiling without recalibrating.
Common Mistakes When Choosing an Editing Monitor
One common mistake is choosing a monitor mainly because it has a high refresh rate. Smooth motion is nice, but color accuracy, panel uniformity, calibration, and proper signal handling are usually more important for video editing.
Another mistake is assuming that all 10-bit monitors behave the same. Some displays use true 10-bit panels, while others use 8-bit plus FRC. That does not automatically make the monitor bad, but it is something to understand before paying a premium.
Many editors also forget the cable and GPU side of the setup. A monitor may support a certain resolution and bit depth, but the computer might not deliver that signal through the selected port or cable. This can lead to limited refresh rates, chroma subsampling, or unexpected display settings.
| Mistake | Why It Causes Problems | Safer Approach |
|---|---|---|
| Buying only for high refresh rate | It may improve interface smoothness but not color reliability. | Prioritize color accuracy, calibration, and panel quality first. |
| Trusting HDR labels blindly | Some monitors accept HDR signals but cannot display strong HDR performance. | Check brightness, contrast, dimming, and real HDR testing. |
| Ignoring room lighting | Changing light affects how you judge contrast and color. | Create a stable editing environment with controlled lighting. |
| Using the wrong color mode | Footage may appear too saturated or too flat. | Match the monitor mode to the project color space. |
| Skipping calibration | The monitor may drift or never match your target accurately. | Use proper calibration tools and repeat the process over time. |
When to Choose a Professional Reference Monitor
A professional reference monitor makes sense when the monitor is not just a workspace display but the main approval device for color-critical delivery. This is common in dedicated grading suites, broadcast environments, high-budget commercial work, and finishing workflows where visual mistakes can be expensive.
If you are editing videos for social media, internal company use, online courses, small business ads, or YouTube, a well-calibrated professional creative monitor may be enough. You still need accuracy, but you may not need the cost of a true reference display.
If clients approve final color in your studio, if you deliver to strict technical specifications, or if your work passes through quality control, it is safer to consult a color specialist, post-production engineer, or official software documentation before building the setup.
Best Practical Setup for Different Editing Workflows
The right monitor depends on what you edit most often. A documentary editor, a colorist, a YouTube creator, and a commercial finishing artist may all need different setups. Buying based on someone else’s workflow can waste money.
For many editors, a strong setup is one accurate main monitor plus a second screen for bins, scopes, scripts, audio panels, or client notes. For higher-end grading, a separate clean-feed monitor or reference display can be more reliable than grading inside the same interface monitor used for timeline work.
| Workflow | Recommended Priority | Extra Care |
|---|---|---|
| YouTube and social video | Accurate Rec. 709 or sRGB, good 4K workspace, reliable calibration. | Check how footage looks on phones, laptops, and TVs without chasing every device. |
| Commercial editing | Strong color accuracy, uniformity, 4K or higher resolution, good client preview. | Keep monitor settings consistent between revisions. |
| Color grading | Calibration, scopes, clean signal path, reference-quality display when budget allows. | Do not rely only on the software viewer for final judgment. |
| HDR projects | True HDR performance, high contrast, suitable brightness, 10-bit workflow support. | Confirm HDR delivery requirements before buying. |
| Motion graphics and design | Sharp resolution, wide color support, good text clarity, consistent white point. | Match color settings across design and editing applications. |
Conclusion
A monitor for high-end video editing should be chosen as part of a complete workflow, not as a standalone gadget. Resolution, color accuracy, calibration, panel type, HDR capability, connectivity, and room lighting all affect how safely you can judge your footage.
For most editors, the smartest path is to start with the delivery format. If your work is SDR, prioritize accurate Rec. 709 performance and calibration. If your work is HDR or broadcast-level finishing, pay closer attention to brightness behavior, contrast, signal path, and reference monitoring requirements.
Before spending more money, confirm the official specifications, check your software workflow, and plan how the monitor will be calibrated after setup. If the project involves strict delivery standards or high-value client approval, getting help from a professional colorist or post-production technician is often the safer choice.
FAQ
1. Is a 4K monitor necessary for high-end video editing?
A 4K monitor is not absolutely required for every editor, but it is highly practical for serious work. It gives you enough detail to review 4K footage more clearly and enough workspace for timelines, scopes, bins, effects, and preview panels. For 1080p-only projects, a good 1440p monitor can still work, but most high-end editing setups benefit from 4K or higher. The key is not resolution alone. A color-accurate 4K monitor is more useful than a larger, cheaper 4K display with poor uniformity and weak calibration options.
2. Is OLED better than IPS for video editing?
OLED can be excellent for video editing because it offers deep blacks, strong contrast, and rich image separation. This is especially useful when reviewing dark scenes or HDR-style material. However, IPS can still be a better choice for some editors because it is often more predictable for long sessions, static interfaces, and SDR workflows. OLED buyers should consider brightness behavior, possible image retention, and how the monitor handles calibration. The better choice depends on whether you prioritize contrast, long editing sessions, HDR review, or stable everyday color work.
3. Do I need a true 10-bit monitor?
A true 10-bit monitor is useful when you work with gradients, log footage, HDR content, high-end color correction, or files that can reveal banding. However, the monitor alone is not enough. Your GPU, cable, operating system, software, and project settings must also support the correct signal. Some monitors use 8-bit plus FRC, which can still look good for many workflows. For professional grading and HDR delivery, true 10-bit support is safer. For general editing, color accuracy and calibration may matter more than the bit-depth label alone.
4. What color space should I choose for video editing?
For most SDR video delivered online, Rec. 709 is the most important color space to understand. It is widely used for standard video workflows and is usually the safest target for YouTube, client videos, courses, interviews, and corporate content. DCI-P3 matters more for cinema-style and wide-gamut workflows. Rec. 2020 is important in HDR pipelines, but many monitors cannot fully display it. The safest approach is to match the monitor mode, project settings, and export target instead of editing everything in the widest available color mode.
5. Can I use a gaming monitor for professional editing?
You can use a gaming monitor for editing if it has strong color accuracy, good uniformity, suitable color modes, and reliable calibration options. The problem is that many gaming monitors prioritize refresh rate, response time, and visual punch over strict color reliability. A high refresh rate can make the interface feel smooth, but it does not guarantee accurate grading. If you already own a gaming monitor, calibrate it and check whether it can cover your target color space properly. For paid color-critical work, a creative or professional monitor is usually safer.
6. How important is factory calibration?
Factory calibration is helpful because it shows the manufacturer attempted to tune the monitor before shipping. Some professional monitors include an individual calibration report, which can be a good sign. However, factory calibration is not a permanent solution. Monitors can drift over time, and your room lighting, brightness target, operating system, and software workflow can affect results. For high-end editing, factory calibration should be treated as a starting point. Regular calibration with a proper measurement device is better for maintaining accuracy across important projects.
7. Should I buy one large monitor or two smaller monitors?
One large, accurate monitor is often better for color-critical work because it gives you one main display to control and calibrate. Two monitors are excellent for productivity because you can separate the timeline, preview, scopes, project files, and communication tools. The challenge is that two different screens may not match perfectly, even after calibration. A practical setup is one accurate main monitor for review and grading, plus a second monitor for interface panels. For advanced grading, a separate clean-feed or reference display can be even better.
8. Does HDR certification mean the monitor is good for HDR grading?
HDR certification can be useful, but it should not be the only reason to buy a monitor. Some displays can accept an HDR signal but do not have the brightness, contrast, black level, or local dimming quality needed for serious HDR judgment. HDR grading requires controlled monitoring, proper software settings, and a display that behaves predictably. Before buying, check the monitor’s real brightness performance, dimming system, 10-bit support, and independent tests when available. For professional HDR delivery, a true reference monitor may still be needed.
9. What monitor size is best for video editing?
For many editors, 27 inches and 32 inches are the most practical sizes. A 27-inch 4K monitor is sharp and fits smaller desks, but some users may need interface scaling. A 32-inch 4K monitor feels more spacious and comfortable for timelines, scopes, and preview windows. Larger screens can help, but they require more viewing distance and desk depth. Ultrawide monitors are useful for timelines and multitasking, but they are not always the best single choice for color-critical review. Choose based on desk space, resolution, and workflow.
10. How often should I calibrate my editing monitor?
The ideal calibration schedule depends on how critical your work is. For casual editing, occasional calibration may be enough. For paid commercial work, monthly or project-based calibration is safer. For color grading, broadcast work, or client-approved finishing, calibration should be part of the regular workflow. You should also recalibrate after major monitor setting changes, operating system updates, graphics driver changes, or room lighting changes. The main rule is simple: if color accuracy affects approval, delivery, or payment, calibration should not be treated as optional.
11. Is DCI-P3 coverage important for every editor?
DCI-P3 coverage is useful, but not every editor needs to prioritize it. If your work is mostly standard online video, Rec. 709 accuracy is usually more important. DCI-P3 becomes more relevant for cinematic projects, wide-gamut workflows, some Apple-device-focused work, and HDR-related content. The mistake is editing Rec. 709 projects in a wide-gamut mode without proper color management, which can make colors look oversaturated. A monitor with strong DCI-P3 coverage is valuable only when your workflow is set up to use it correctly.
12. Should I trust monitor specifications listed on online stores?
Online store specifications can be useful for a quick overview, but they should not be your only source for a serious purchase. Marketplace listings may simplify details, omit limitations, or use broad marketing terms. Always confirm important details on the manufacturer’s official page, especially color gamut, bit depth, ports, HDR support, calibration options, warranty, and included cables. If the monitor is expensive, look for independent measurements as well. For high-end editing, small specification differences can affect the entire workflow, so it is worth checking carefully.
Editorial note: This article is educational and does not replace professional color workflow planning for studios, broadcast deliveries, HDR mastering, or projects with strict client approval requirements. Always confirm technical requirements with official software documentation, monitor manufacturers, and qualified post-production professionals when accuracy is critical.
Official References
- Adobe Help Center — Color management in Premiere
- VESA — Certified DisplayHDR
- International Color Consortium — ICC specifications
- ITU — Recommendation BT.709
- ITU — Recommendation BT.2100
Dr. Silas Olive is a display technology and digital productivity enthusiast with over a decade of hands-on experience testing monitors, calibrating panels, and building workstations for creators and office professionals. He founded Olive HD to translate complex technical specifications — such as refresh rates, color gamuts, and HDR standards — into straightforward guidance that anyone can use to choose, configure, and optimize their own screen setup. His focus is on helping readers avoid expensive purchasing mistakes and squeeze the best visual performance out of the equipment they already own.